Organize your Necklaces and Create a Piece of Art (Necklace Holder DIY)
Necklace Holder DIY
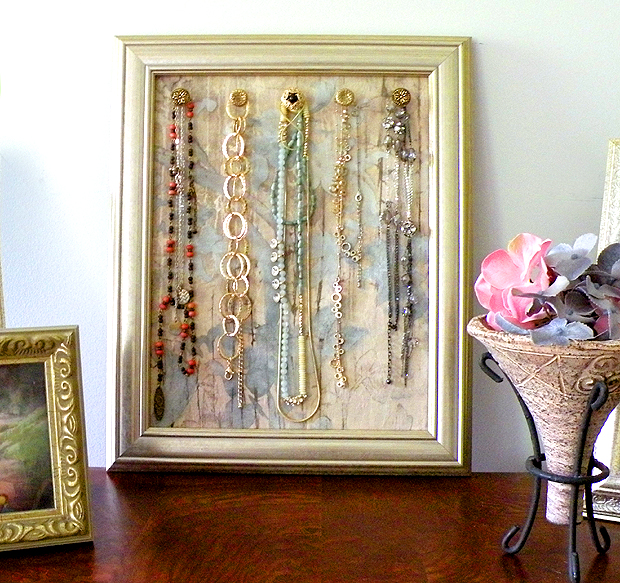
Learn how to make this beautiful Necklace Holder DIY with a few easy to find materials. This amazing necklace holder display is easy to make and looks great as a useful decoration.
Now that the holidays are over, it is time to start thinking about getting your house in order. The first thing that comes to mind after packing up all of the holiday decorations is getting organized. One area I needed help with was to find a nice way how to organize necklaces without them getting tangled and intertwined with other necklaces.
My solution was to create this necklace organizer that looks like a piece of art. It can accent my dresser and also is a very functional way to store my necklaces.
Materials
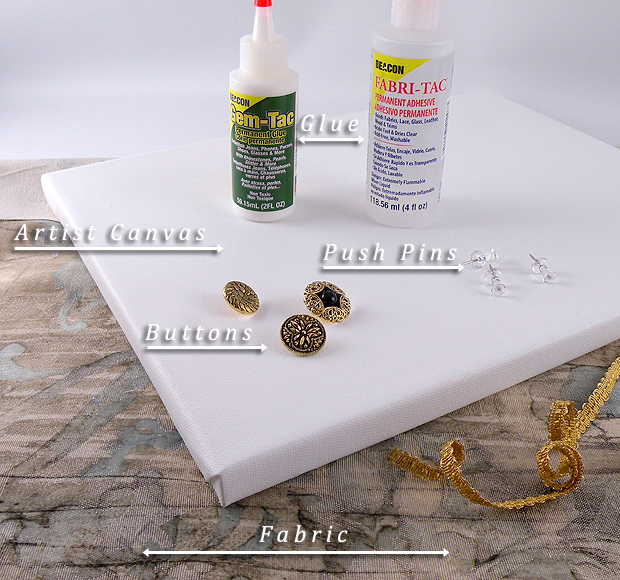
- Artist Canvas (stretched art canvas over a wooden frame)
- Picture Frame the size of the canvas
- Decorator Fabric
- Push Pins
- Buttons
- Metal File
- Beacon Fabri-Tac Glue
- Beacon Gem-Tac Glue
How to Make a Necklace Holder DIY
Step 1: Measure the fabric to the size of the Artist Canvas plus enough extra to wrap around the sides and inner edge of the board.

Step 2: Use Beacon Fabri-Tac glue to attach the fabric to the artist canvas. Glue the fabric to the inside edge on one side of the wooden frame first to secure. Work in small sections, smoothing the fabric with your hands to make sure it is attached to the canvas.
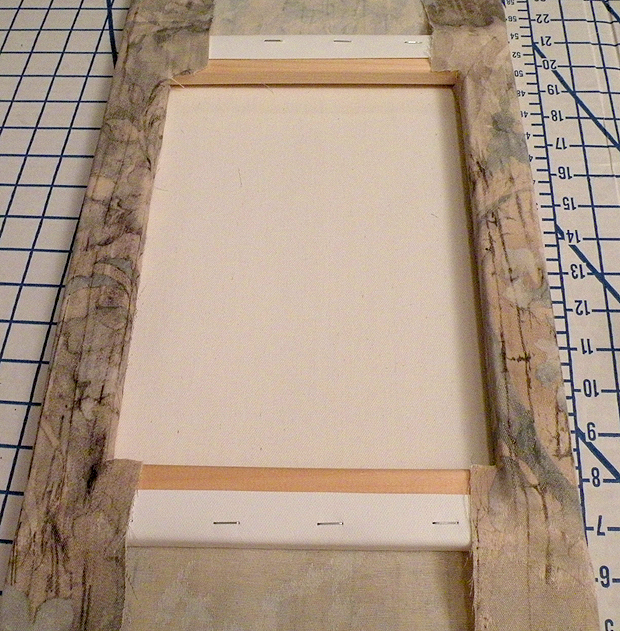
Step 3: Trim the inside edge of the fabric so it fits nicely on the inside corners of the frame and to remove the bulky excess.

Step 4: Fold the ends of the fabric up and over the edge of the frame and glue.

Step 4: Trim the remaining excess fabric the length to fit to the inside edge of the frame. Turn the ends of the fabric up and over the frame and glue.
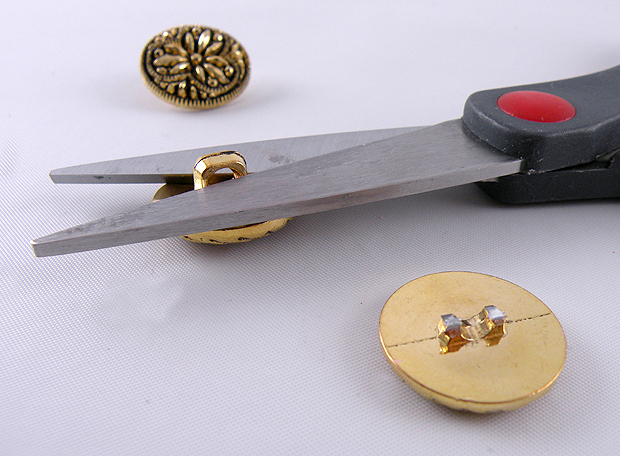
Step 5: Cut off the loop of the button with scissors.
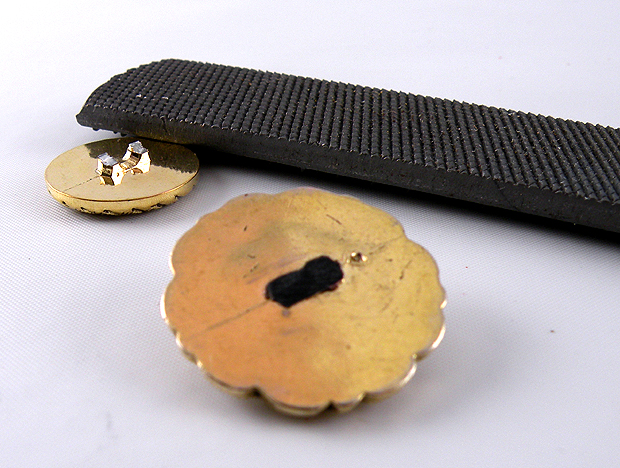 Step 6: File the remaining piece of the loop flat with a metal file.
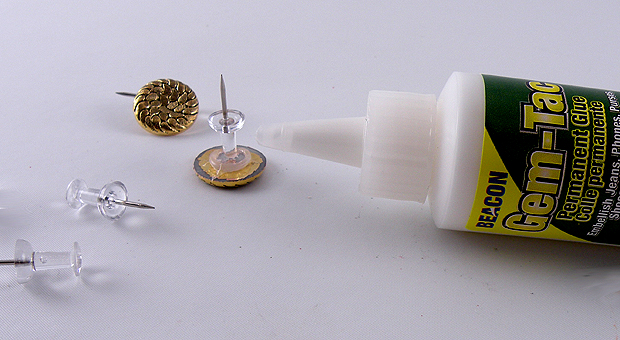
Step 7: Attach the button to the top of a push pin with Beacon Gem-Tac glue and let dry.
 Step 8: Push the button covered push pins, evenly spaced, into the wooden part of the frame.
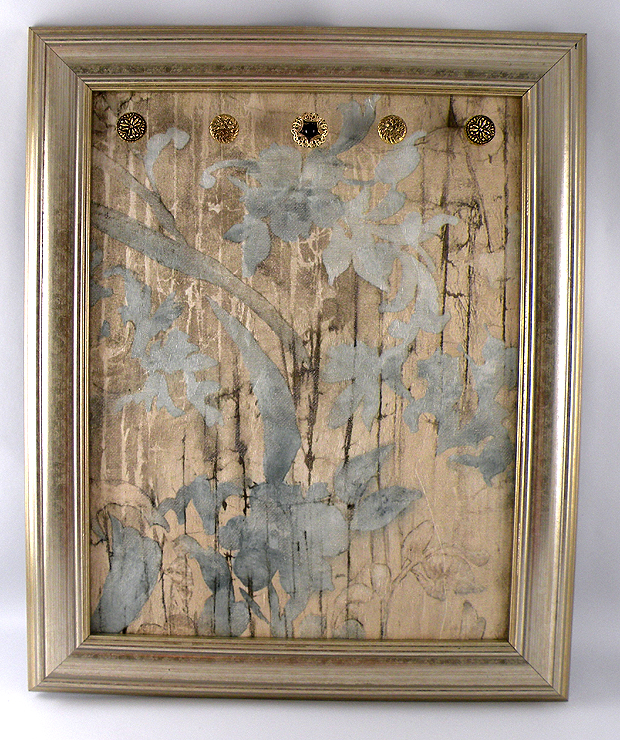
Step 9: Remove the glass and cardboard backing from the frame and fit the necklace hanger into the frame.
You can add glue to the inside edges of the frame if you would like to lock everything in place. I just wedged the canvas board into the frame and it was secure. The push pins can be easily removed to add more hangers. The finished product can sit on a dresser leaned up against a wall like I did or hung up like a picture. Be creative and choose different fabrics, buttons and frame colors to match your decor. You can ever make some smaller versions to hold bracelets or keys. This would also be a nice addition to a walk in closet.