EASY DIY Dollar Tree Bat Pumpkin (No‑Carve Craft!)

If you want a cute, fast, and budget‑friendly Halloween craft, this Easy DIY Dollar Tree No-Carve Bat Pumpkin is the perfect no‑carve project. It’s adorable, kid‑friendly, and only takes a few minutes to make. Plus, everything comes from Dollar Tree or items you already have at home.
This is a great Halloween decoration for mantels, party tables, classrooms, or fall displays — and it’s mess‑free since there’s no carving required.
Watch the Quick Tutorial for the No-Carve Bat Pumpkin
Here is a quick 10 second tutorial video Short of the Cute Pumpkin Bat so you can see exactly how it comes together. Let me know what you think in the comments on my YouTube Channel.
Please Subscribe to my YouTube Channel
I upload new DIY videos every week!
Supplies for the No-Carve Bat Pumpkin
- Small foam pumpkin (Dollar Tree
- Large Styrofoam Ball
- Black acrylic paint
- Gold acrylic paint
- Silver 3D puffy Paint or Silver Marker
- Black craft foam or cardstock (Eyes, Wings, Ears)
- White Craft foam (Fangs and Eyes)
- Small piece of pink foam, felt or paper (ears)
- Hot Glue Gun
- Craft glue
- Craft Scissors
My Favorite Tools
Amazon Associates Disclosure
www.GinaTepper.com is a participant in the Amazon Services LLC Associates Program, an affiliate advertising program designed to provide a means for sites to earn advertising fees by advertising and linking to Amazon.com.
Step-by-Step No-Carve Bat Pumpkin Tutorial
Step 1: The Foam Pumpkin and Styrofoam Ball
Paint the Styrofoam Ball Black. You may need 2 coats to make it completely covered.
Paint the foam pumpkin gold. Only use one coat because the orange will shine through and give the pumpkin a mysterious glow.
Let the Styrofoam Ball and the Pumpkin dry completely.
Step 2: Create the Bat Wings
Cut two wing shapes from black foam or cardstock. You can make them rounded and cute, or more pointed for a spooky look.
Draw lines in the wings with silver 3d paint or a silver marker and let dry.
Attach the wings to the pumpkin with hot glue.
Step 3: Add the Face
Make the eyes by tracing a bottle cap onto craft foam.
Cut out tiny pink ears, and two small white fangs out of craft foam or paper. This gives the bat its adorable expression.
Attach the face pieces to the pumpkin with craft glue.
Step 4: Attach the Bat to the Pumpkin
Glue the bat body to the top of the pumpkin with a hot glue gun to complete your cute Halloween character.
Step 5: Add Fall Leaves or Straw (Optional)
Place your bat pumpkin on a bed of faux leaves or straw for a festive fall touch.
🦇 Why This Craft Is Perfect for Halloween
- No carving — kid‑safe and mess‑free
- Budget‑friendly — Dollar Tree supplies
- Quick and Easy — takes just a few minutes
- Cute + festive — great for parties and displays
- Friendly — high‑contrast, seasonal, adorable
🎃 More Easy Halloween DIYs
If you love quick Dollar Tree Halloween crafts, here are a few more ideas you can try next:
👻 DIY Ghost Pumpkin
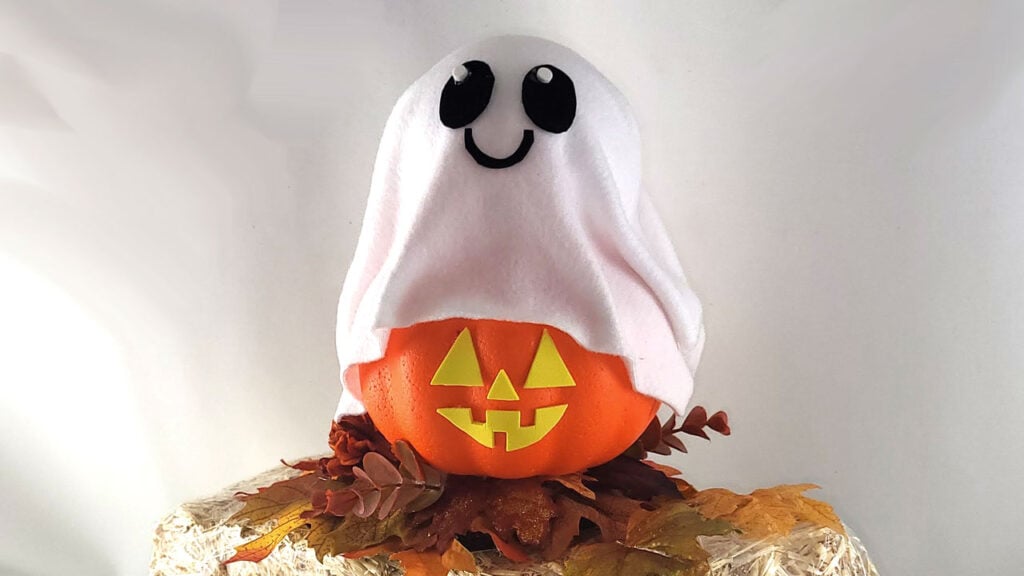
Looking for another creative Halloween pumpkin idea? Try this DIY Ghost Pumpkin! This spooky pumpkin is a fun Halloween decoration and pairs perfectly with the DIY bat pumpkin. It’s another budget-friendly project you can make for your Halloween display.