DIY Easter Chicks Using Real Eggshells

Learn how to make these adorable DIY Easter Chicks gift wrap designs. I have always loved reusing items that are normally discarded and turning them into something unexpected and wonderful. When I was asked to create a whimsical Easter gift design for Nashville Wraps, I immediately thought of using real cracked eggshells to create these adorable Easter chicks hatching from their eggs.
Real eggshells are not as fragile as you might think. They look better and more realistic than a plastic Easter egg because they are real eggshells. They make a great accent to the DIY Easter chicks or for any Easter decoration. To prepare the real eggshells, they need to be washed thoroughly, dried, and sealed with white glue to strengthen them. Once dry, they can be painted and decorated to add a natural accent to your DIY Easter chicks.
Another fun Easter Decoration that uses real eggshells is this DIY Bird’s Nest Centerpiece and a DIY Easter Wreath design that is accented with real eggshells.
Materials Used for the DIY Easter Chicks Gift Designs
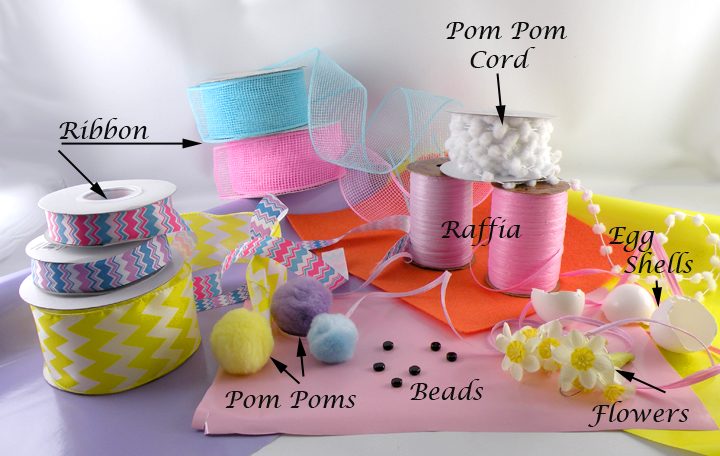
- Recycled Gloss Wrapping Paper
- Chevron Ribbon
- Raffia
- Wired Pom Pom Cord
- Mesh Ribbon
- Egg Shells
- White Glue
- Acrylic Paint
- Pom Poms
- Fabric Spring Flowers
- Orange Felt
- Glue gun
- Craft Glue
- Double-Sided Tape
- White Jewelry Boxes
- Recycled White Gift Boxes
How to Make DIY Easter Chicks Gift Design
Preparing Real Eggshells
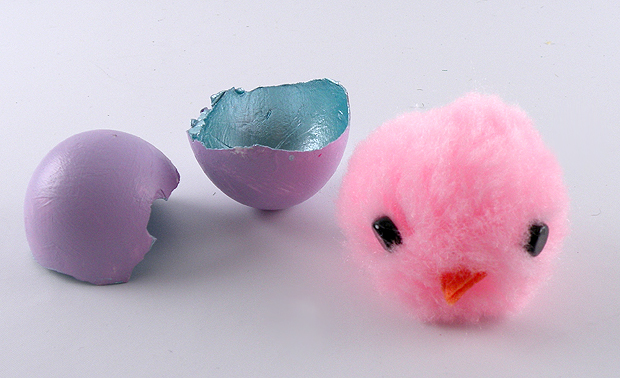
1. Prepare your eggshells for this design by washing and drying real eggs shells.
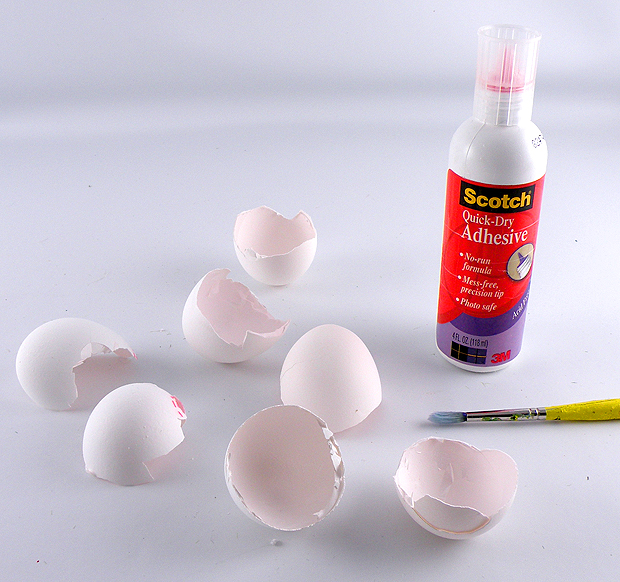
2. Using white glue, (any white glue will work) paint the outside and inside of the eggshell with the glue and let dry. This will stabilize the shells and also prime them for the paint.
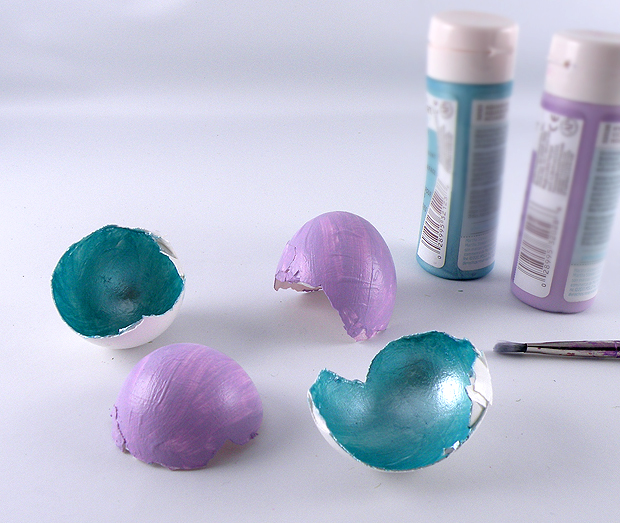
3. Paint the shells with acrylic paint to coordinate with the gift’s colors. Paint the inside and outside different colors to make them more playful.
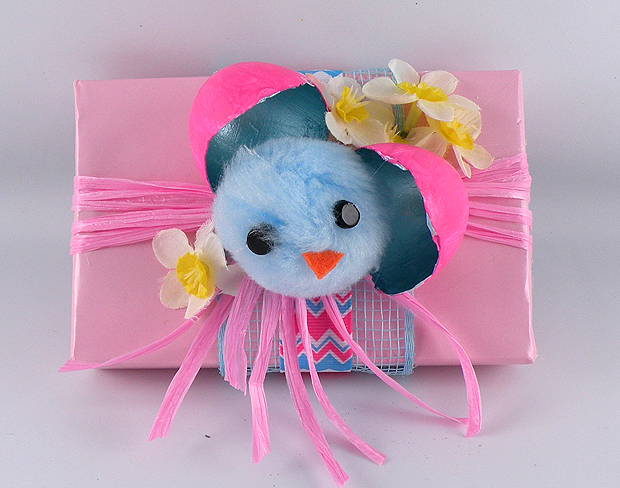
Jewelry Box Design
1. Wrap a box in Recycled Gloss Wrapping Paper.
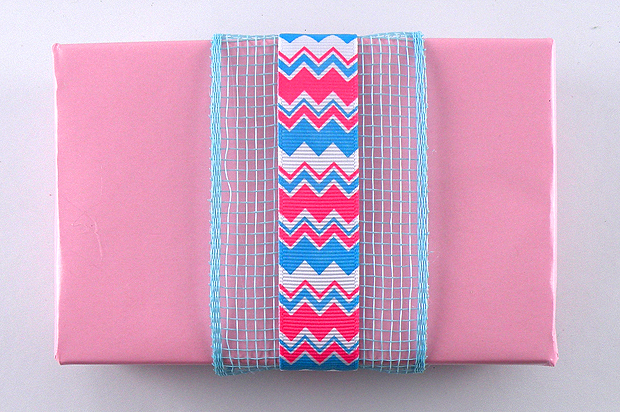
2. Wrap a piece of the Mesh Ribbon around the box, overlapping the ends on the bottle of the box. Use craft glue to secure.
3. Layer a piece of the Chevron Ribbon over the Mesh Ribbon as shown and secure the ends on the bottom of the box with craft glue.

4. Wrap the Raffia Ribbon four times continuously around the box and tie it together, leaving a few inches for tails. Trim the tails to matching lengths.

5. To make the baby DIY Easter chicks, cut a triangle from the orange felt to make a beak and attach the eyes and the beak to the pom pom with craft glue.
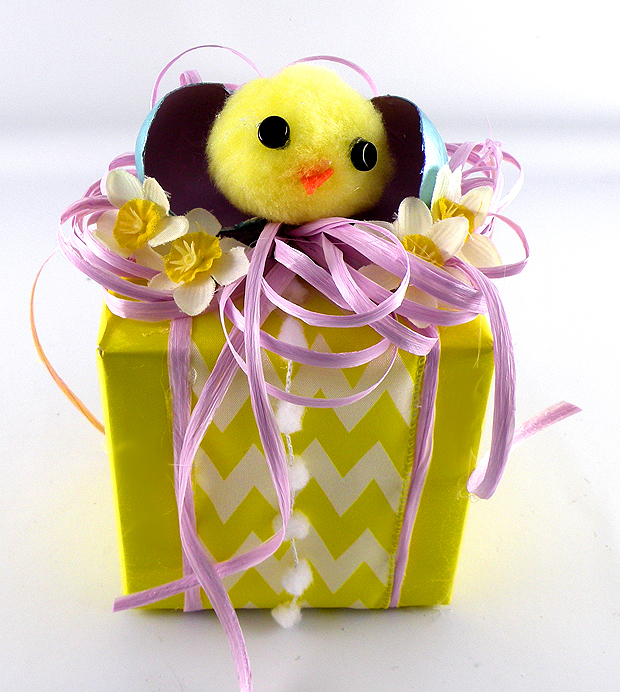
6. Using the glue gun, attach the eggs, baby DIY Easter chicks and flowers to the front center of the gift box to finish your cute design.
Gift Box
Instructions
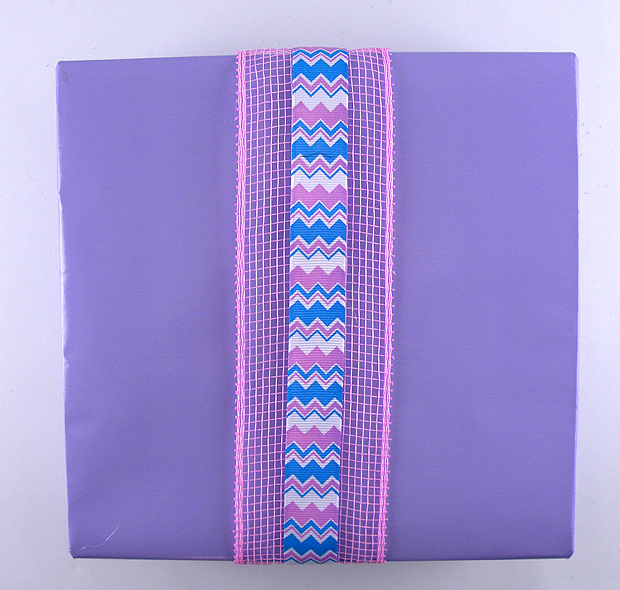
1. Wrap a box in Recycled Gloss Wrapping Paper.
2. Wrap a piece of the Mesh Ribbon around the box, overlapping the ends on the bottle of the box. Use craft glue to secure.
3. Layer a piece of the Chevron Ribbon over the Mesh Ribbon as shown and secure the ends on the bottom of the box with craft glue.
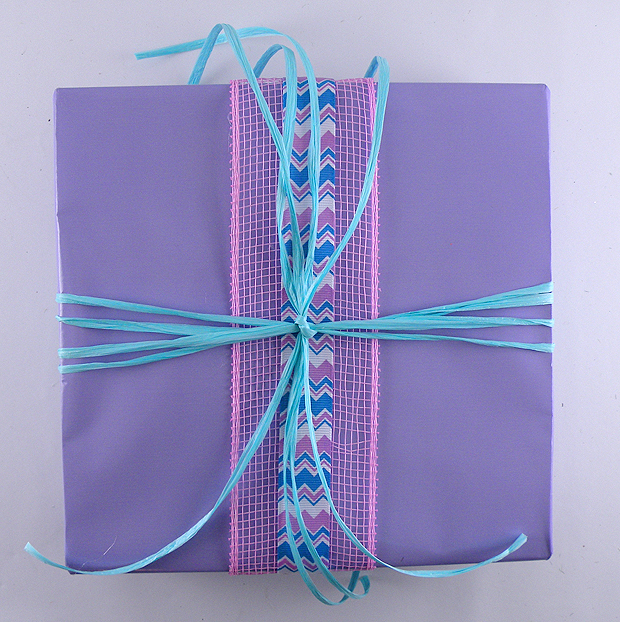
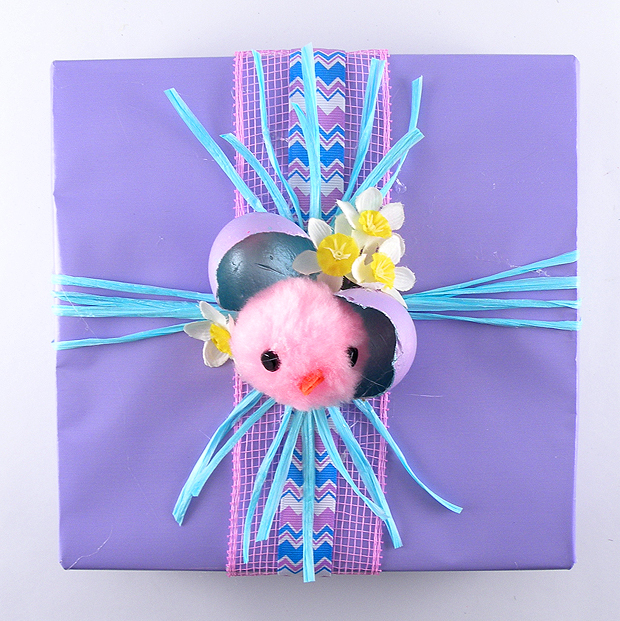
4. Wrap the Raffia Ribbon four times continuously around the box and tie together, leaving a few inches for tails. Trim the tails to matching lengths.
5. To make the baby DIY Easter chicks, cut a triangle from the orange felt to make a beak and attach the eyes and the beak to the pom pom with craft glue.
4. Using the glue gun, attach the eggs, baby DIY Easter chicks and flowers to the front center of the gift box to finish your Easter design.
Gift Box
Instructions
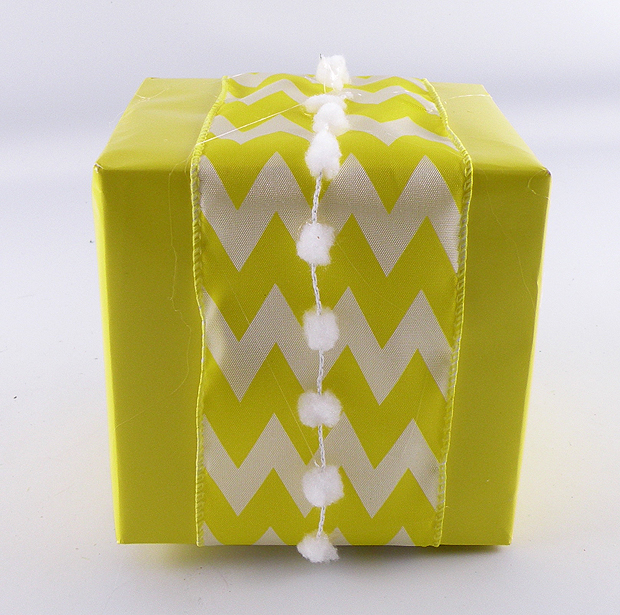
1. Wrap a box in Recycled Gloss Wrapping Paper.
2. Wrap a piece of the Chevron Ribbon around the box, overlapping the ends on the bottle of the box. Use craft glue to secure.
3. Layer a piece of the Wired Pom Pom Cord over the Chevron Ribbon as shown and secure the ends on the bottom of the box with craft glue.
 4. Using craft glue, outline the edges of the Chevron Ribbon with the Raffia Ribbon as shown.
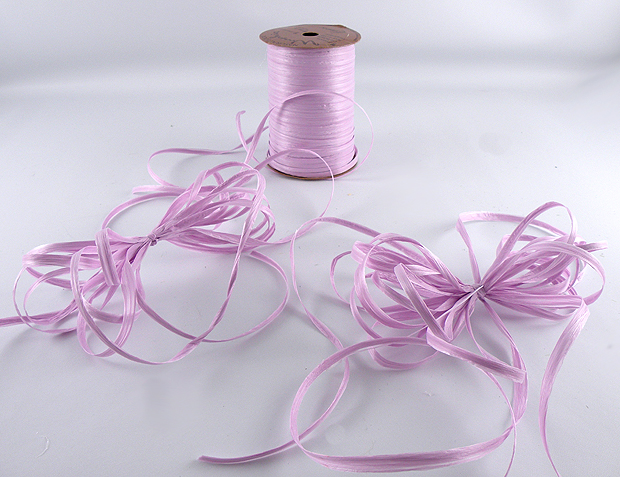
5. Create two bows by looping the Raffia 20 times and tying the center of the loops with a separate piece of Raffia. Leave several inches for tails.
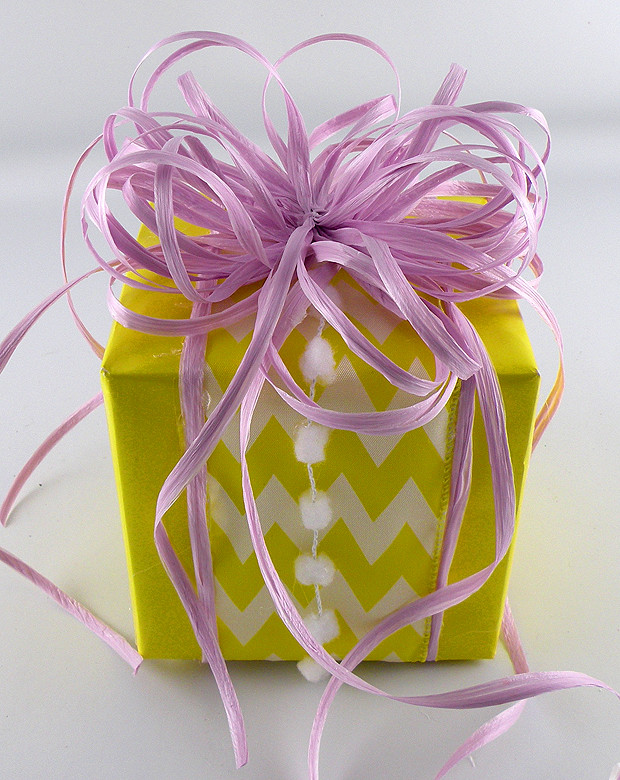
6. Glue the two bows to the top of the gift box and trim the tails while still leaving them long and flowing.
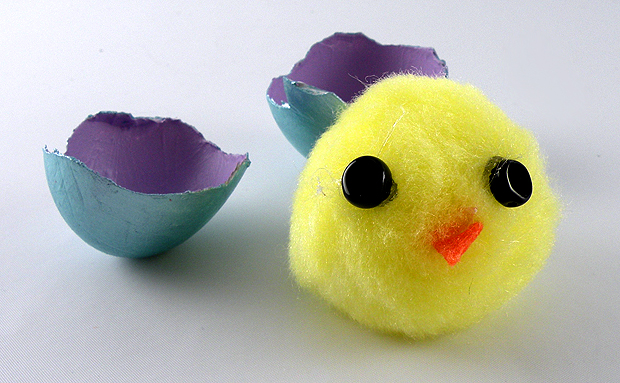
7. To make the baby DIY Easter chicks, cut a triangle from the orange felt to make a beak and attach the eyes and the beak to the pom pom with craft glue.
8. Using the glue gun, attach the eggs, baby DIY Easter chicks and flower to the front center of the gift box to finish your whimsical design.