DIY Scary Halloween Decorations (DIY Wraith Decoration)
Learn how to make unbelievable DIY scary Halloween Decorations like this DIY Wraith Decoration for a few dollars using household items. I wanted to create some DIY scary Halloween decorations this year. I typically make a mixture of cute and creepy Halloween decoration ideas but this year I wanted something more menacing.
Download the Wraith Printable Lantern Pattern
I was asked to create a Halloween decorations TV segment for NBC Affiliate WBAL Baltimore and I thought I would make something that was spooky but easy to recreate. My Halloween DIY props are made from reused, household items and inexpensive things from the craft store so it is not difficult to find the supplies I used.
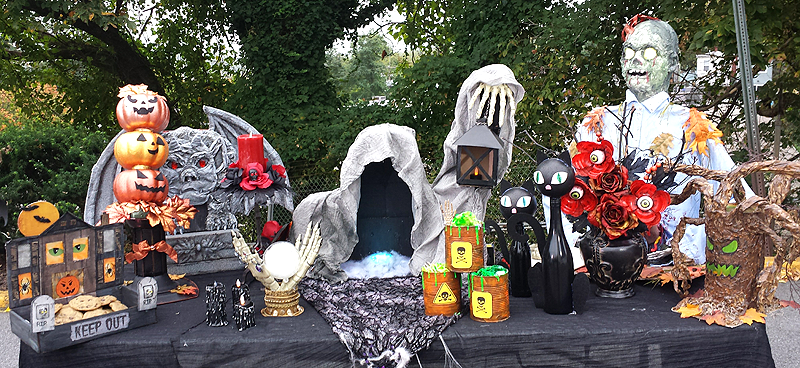
When I have a TV segment, I love to bring a show stopper. I always try to surprise the host with how I made my DIY scary Halloween decorations and the reused materials I used. One year, the producer asked me to make a zombie coming out of the ground with worms coming out of his stomach. I always love it when I am challenged to make something interesting. At his request, I created Zead. Everyone loved him and he has become an inspiration for my DIY scary Halloween Decorations.

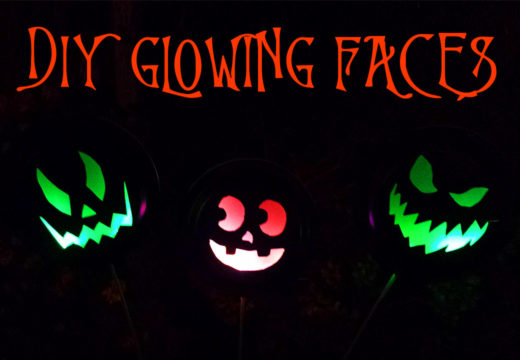
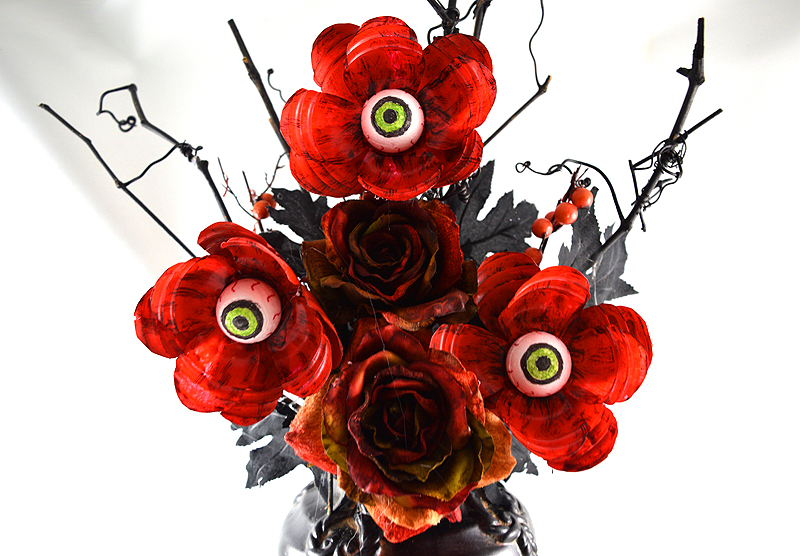
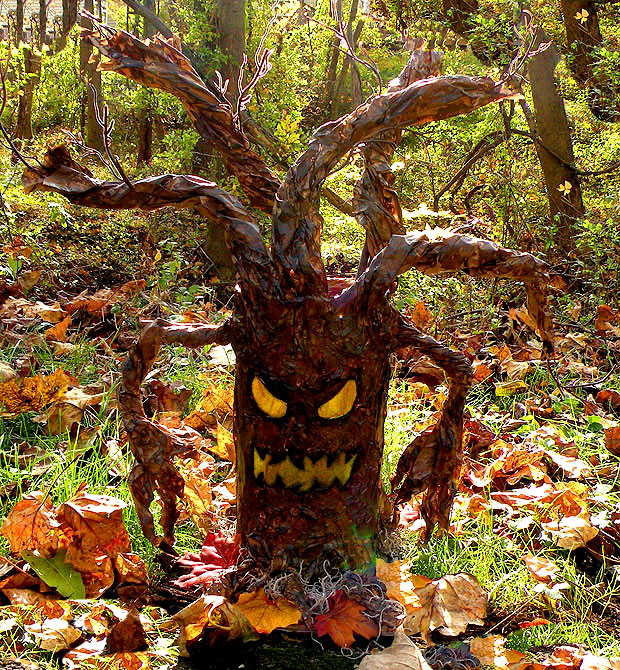
Some of the other show stoppers I have made in the past are not so scary Halloween decoration ideas. I made a Zombie puppy and dog house which was meant to be Zead’s pet made from cardboard, a gargoyle also made from cardboard and paper, spooky DIY Halloween eyeball flowers made from water bottles, and a DIY spooky tree made from an oatmeal container.
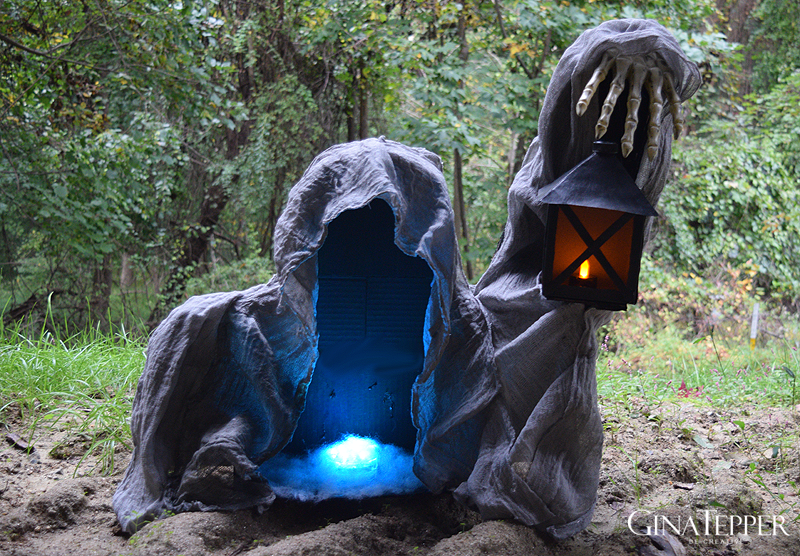
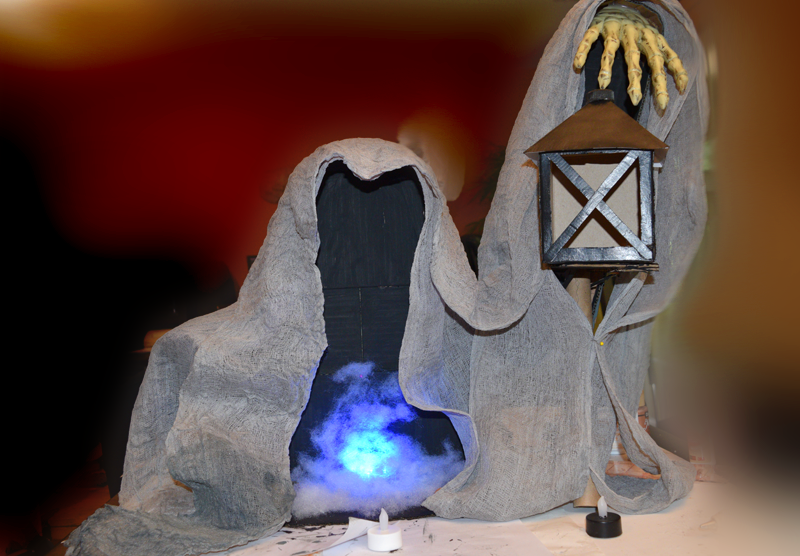
I wanted to make something that was a scary Halloween decoration without blood and gore but more mysterious and thought-provoking. A wraith coming out of a misty ground, shrouded in a grey cloak holding a lantern while he is looking for his next victim was perfect. Not being able to see his face makes him all the more scary and ominous.
Download the Wraith Printable Lantern Pattern
Once I can visualize a design in my head, I know exactly how I am going to make it and what it is going to look like. I usually alter my original Halloween Decoration idea as I am creating it but I need to be able to see it to begin designing it and know what supplies I will be using.
The DIY Halloween Wraith was created from a reused cardboard box for the shape, a tissue box for the lantern, and dyed cheesecloth for the cloak. I show how to dye cheesecloth with acrylic paint. I purchase a skeleton hand from Dollar Tree and used a tea light and a LED light to illuminate the lantern and the wraith. The finished wraith is 25 inches tall at the highest point where his hand is holding the lantern and 25 inches wide.
Here is my most recent Halloween TV segment where I showed how I made my wraith along with more of my DIY Halloween decoration ideas and props.
DIY Scary Halloween Decorations From Reused and Inexpensive Items
Materials Use to Make the DIY Wraith Decoration
- Large Cardboard Box
- Tissue Box
- Cardstock
- Black, White and Gray Acrylic Paint
- White School Glue
- Cheesecloth
- Skeleton Hand (Dollar Tree)
- Download the Wraith Printable Lantern Pattern
- Hot Glue Gun
- Tea Light and LED Light
How to Make DIY Scary Halloween Decorations – Wraith
These step-by-step instructions are for how to make the wraith, dying the cheesecloth and creating the lantern.
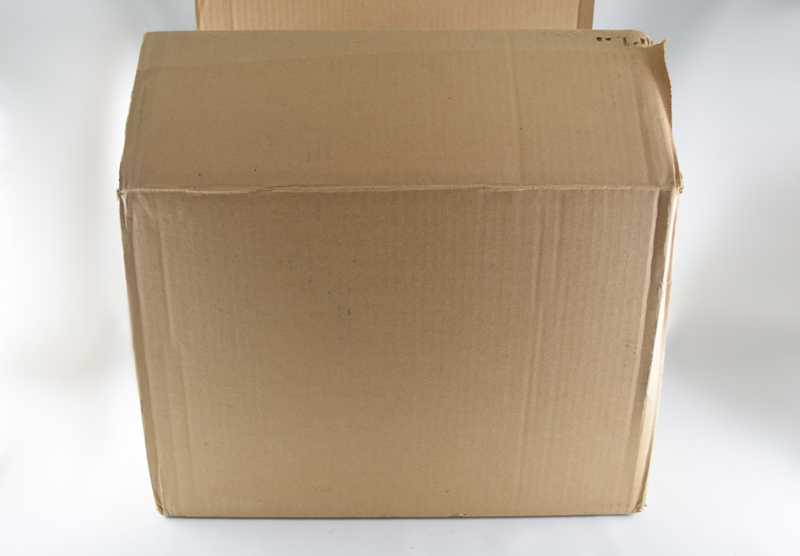

- Use a large shipping box opening up the side of the box.

- Cut open the side of the box. Flip the box so the bottom part will become the part with the body and head.
- Cut the sides of the box to make a base as shown.
- Draw the shape of the wraith on the box and cut it out. The arm will not be long enough so a piece will need to be added to lengthen.


- Cut strips of cardboard about 2 inches wide and glue them around the shape of the wraith with a hot glue gun.

- Hot glue a cardboard piece to the arm the make a shelf. This will hold the lantern.
- Attach the skeleton hand to the top of the arm with hot glue.

- Glue a paper tube to the bottom of the shelf to secure and make the wraith more stable.
- Paint the inside of the wraith black and the top and side gray.
How to Dye Cheesecloth
You can dye cheesecloth with acrylic paint.

- Place the cheesecloth in a plastic bucket.

- Fill the bucket with about 6 inches of warm water.
- Pour black, gray and white acrylic paint into the water along with some white school glue.
- You don’t need much paint. Just put a few squirts of each color into the water until you get a good color.
- Stir to mix up the paint and glue. I used a stick to stir.


- Place the cheesecloth into the paint and glue mixture
- Push down and lightly stir with the stick and let soak for about 10 minutes.

- Squeeze the paint solution out of the cheesecloth so it is not dripping. DO NOT RINSE.
- Lay on paper bags to dry. I put it outside and it dried completely in a few hours.

- Once the cheesecloth is dry, it will have a beautiful gray color from the combination of mixing the paint with the water and it will have a stiff texture from the white glue.
How to Make the Lantern for the DIY Scary Halloween Decorations

- Draw a box on one of the sides of the tissue box without the overlap.

- Cut out the square.
- Cut out 2 strips of stiff cardboard to make the window.

- Glue the strips to the front of the window in X format as shown above.

- Download the Wraith Printable Lantern Pattern
- Cut out the triangle pattern and trace it on to cardstock.
- Cut out 4 triangle pieces to make the top of the lantern.

- Fold in two sides of the triangle.

- Apply glue to the folded pieces and attach to make the triangle top of the lantern.

- Layer the pieces together to see how they fit. Use a water bottle cap for the top of the lantern.

- Paint all of the lantern pieces black with multi-surface acrylic paint an let dry.

- Glue the pieces together with a hot glue gun.
Assemble the Wraith Decoration
- Drape the cheesecloth over the wraith form until you are happy with the way it looks.
- Using a hot glue gun, secure the cheesecloth to the cardboard shape all around the body, head and arm. Take plenty of time to attach all the areas of the cloak and to secure them to other layers of the cheesecloth.
- Glue the lantern to the cardboard shelf.
- Glue some fiberfill to the bottom inside of the wraith to simulate fog and mist.
- Paint the tea light black.
Place the lights inside the lantern and inside the cloak to complete the DIY Scary Halloween Decorations.
Here is a are more of my DIY Halloween crafts and decoration ideas.