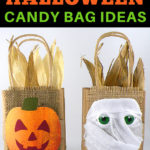
DIY Pumpkin and Mummy Halloween Candy Bags
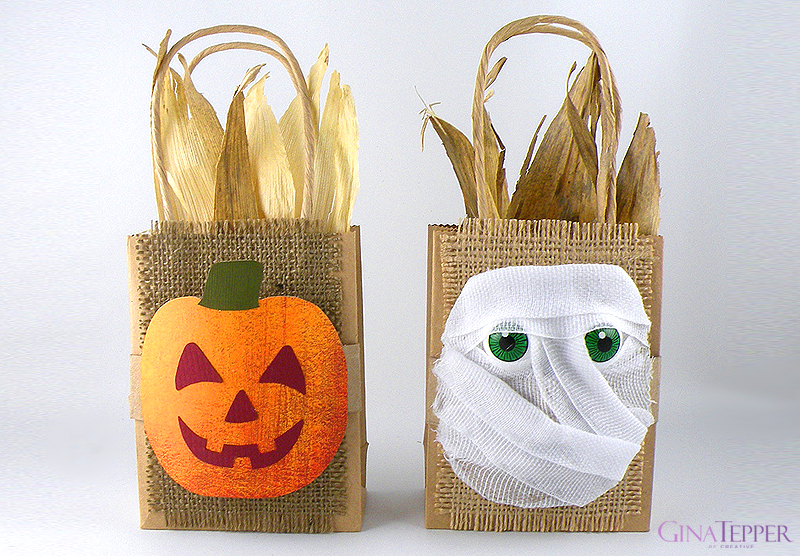
Combine the textures and natural elements of the fall into these fun DIY Halloween Candy Bags. These cute, DIY Halloween candy bags are so easy to make from household and inexpensive items. The pumpkin and mummy are made out of a cut paper tube and attached to the gift bag so faces lift off the bag to give them a 3-dimensional look.
I love using burlap to accent fall and Halloween gift wrap and goodie bags. Burlap is very inexpensive and can be purchased by the yard at the craft store in multiple arrays of colors. You would only need a small piece for this design. It can easily be cut and edges frayed to decorate with a rustic, harvest flair.
Not only can Burlap be used to accent gift wrapping and crafts but can also be placed under decorative accents on an entry table dining table. Here I used burlap on my fall gift wrap design How to Wrap a Bottle of Wine for Thanksgiving.
Rather than using tissue paper to fill the bags, corn husks are used to add natural, fall elements to the presentation. These fun Halloween treat bag ideas are a perfect gift for friends, teachers, adults, and kids! Here are some more of my DIY Halloween Candy Bag Ideas.
These Halloween Gift Bags would look great next to my DIY Halloween Black Cat Decoration.
Materials for the Halloween Candy Bags
- Small Brown Gift Bags with Handles
- Paper Towel or Toilet Paper Roll
- Burlap
- Orange, Brown and Green Scrapbooking Paper
- Plastic Eyes
- Gauze Strips
- Craft Glue
- Corn Husks
How to Make the Halloween Candy Bags (Pumpkin)
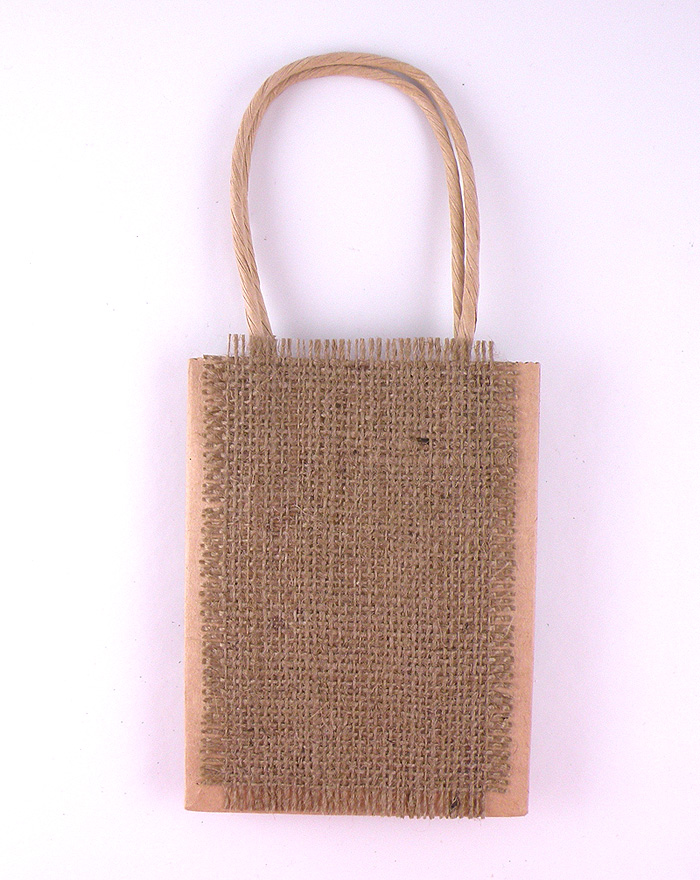
Step 1: Cut a piece of burlap the size of the front of the bag and fray the edges. Glue on to the bag with craft glue as shown above.
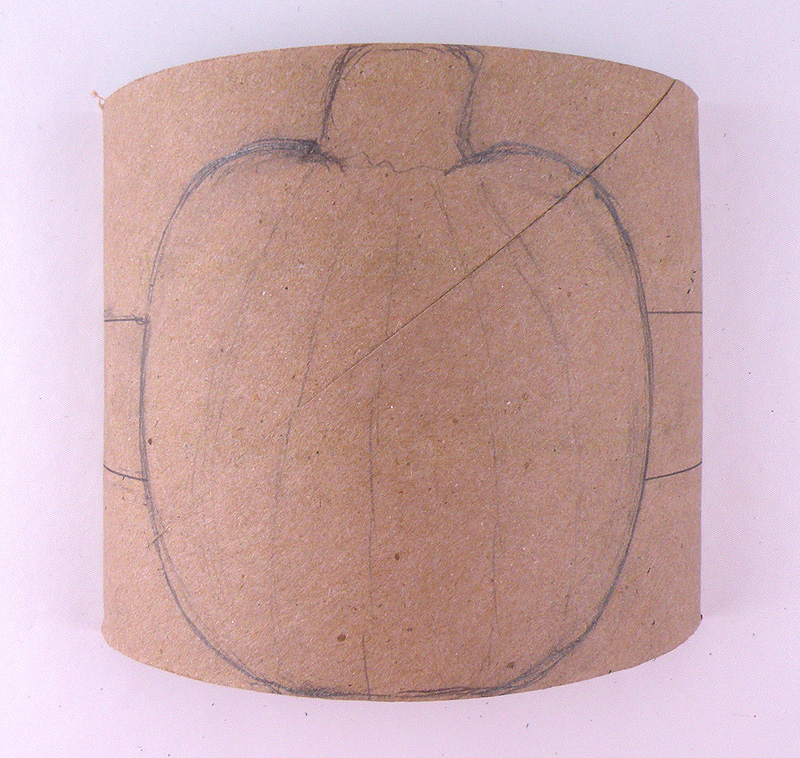
Step 2: Cut open a paper tube and draw the shape of a pumpkin. Draw tabs on each side of the pumpkin shape. These will attach to the bag.
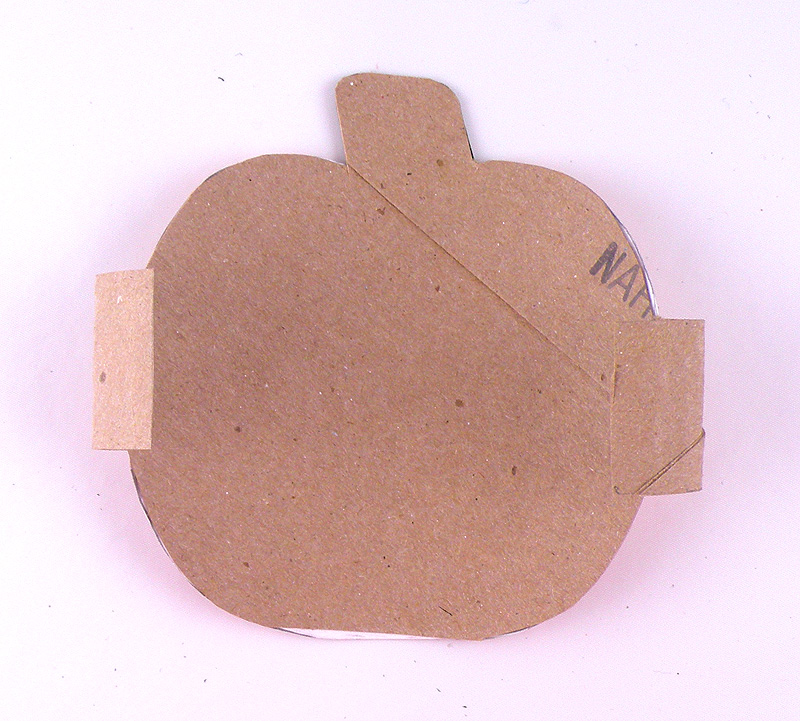
Step 3: Cut out the shape and bend the tabs in.
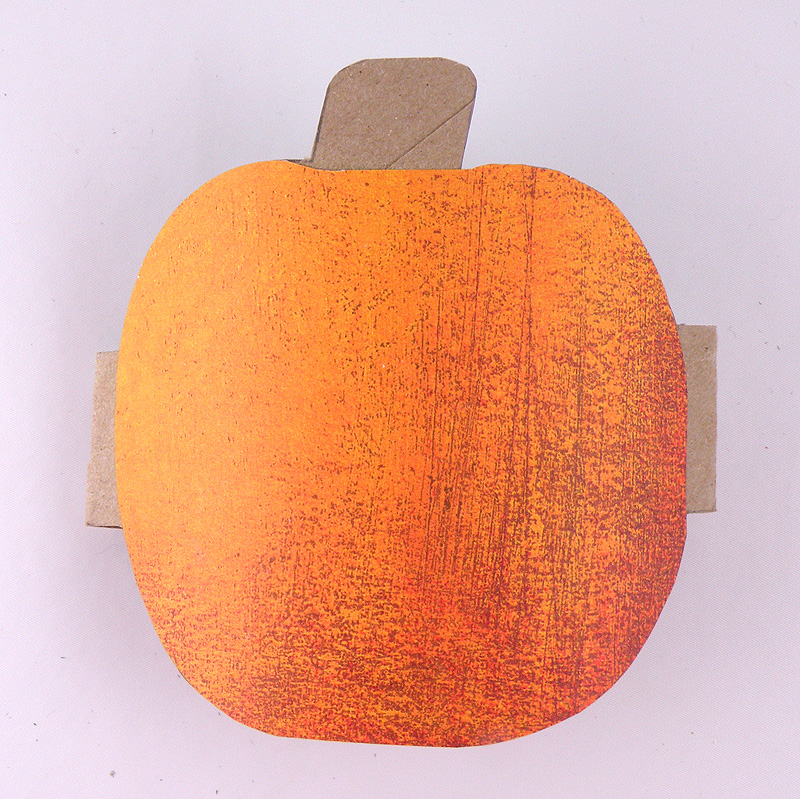
Step 4: Cut a piece of scrapbooking paper the size of the pumpkin and attach with craft glue.
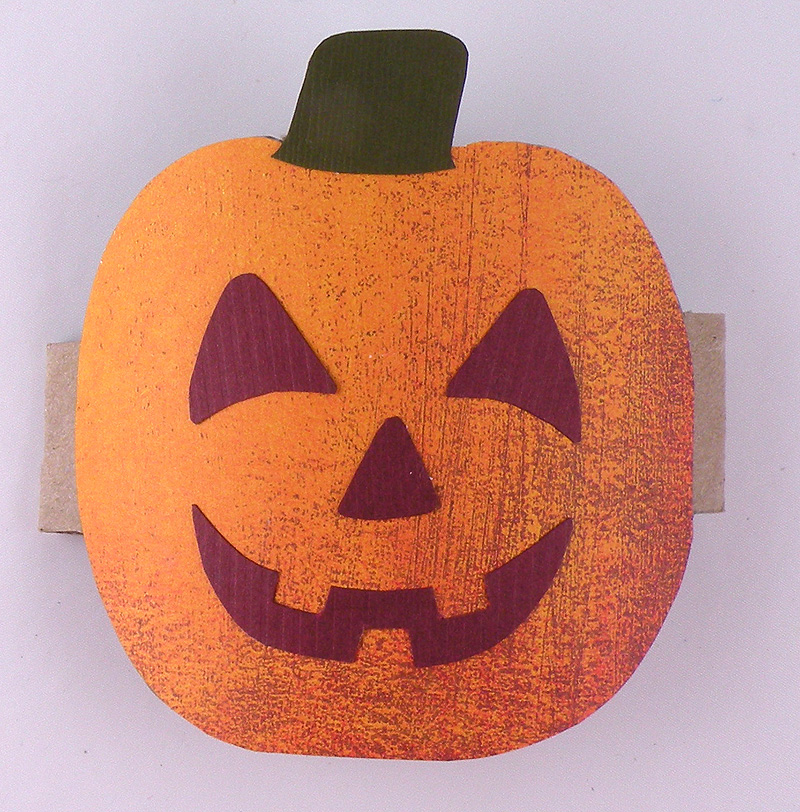
Step 5: Cut out a jack-o-lantern face and pumpkin stem with scrapbooking paper and glue onto the pumpkin with craft glue.
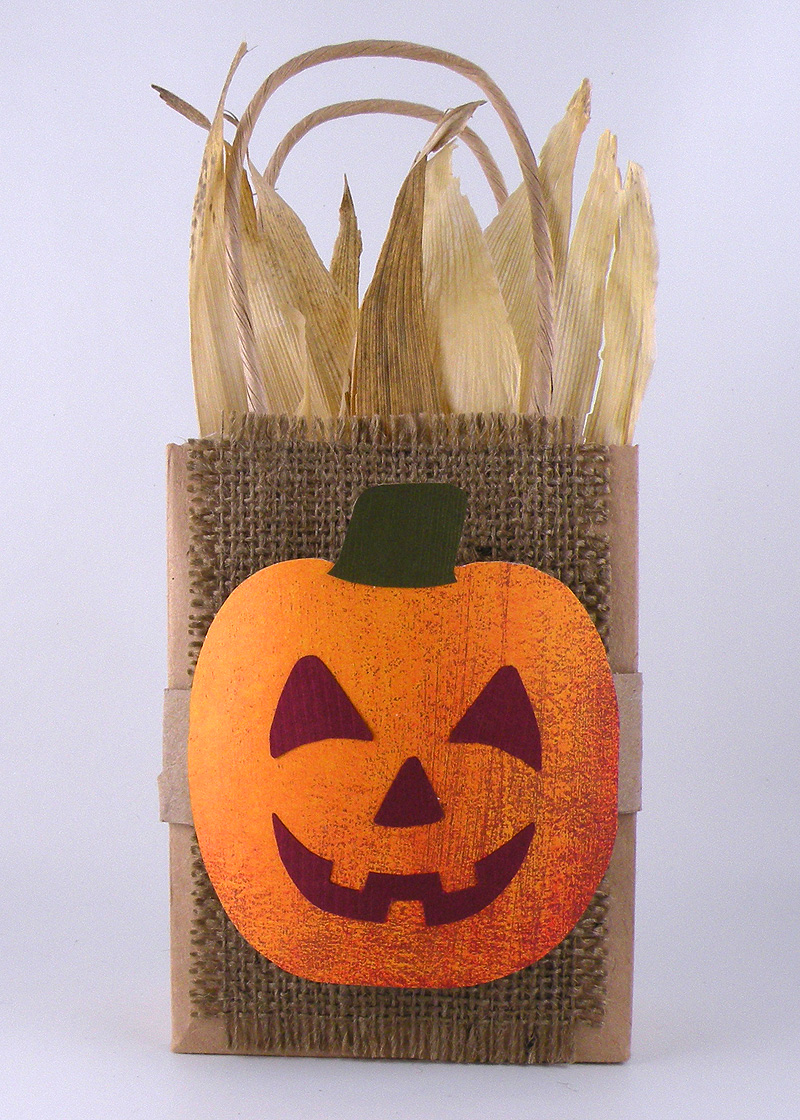
Step 6: Glue the tabs to the candy bag and insert corn husks to finish the look.
How to Make the Halloween Candy Bags (Mummy)
Step 1: Cut a piece of burlap the size of the front of the bag and fray the edges. Glue on the bag as shown above.
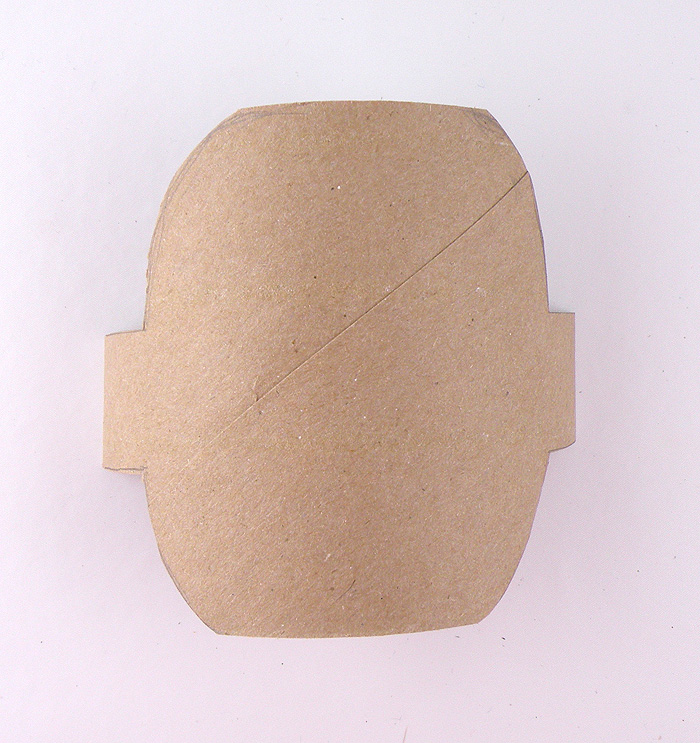
Step 2: Cut open a paper tube and draw the shape of a mummy head. Draw tabs on each side of the head shape. These will attach to the bag. Cut out the shape and bend the tabs in.
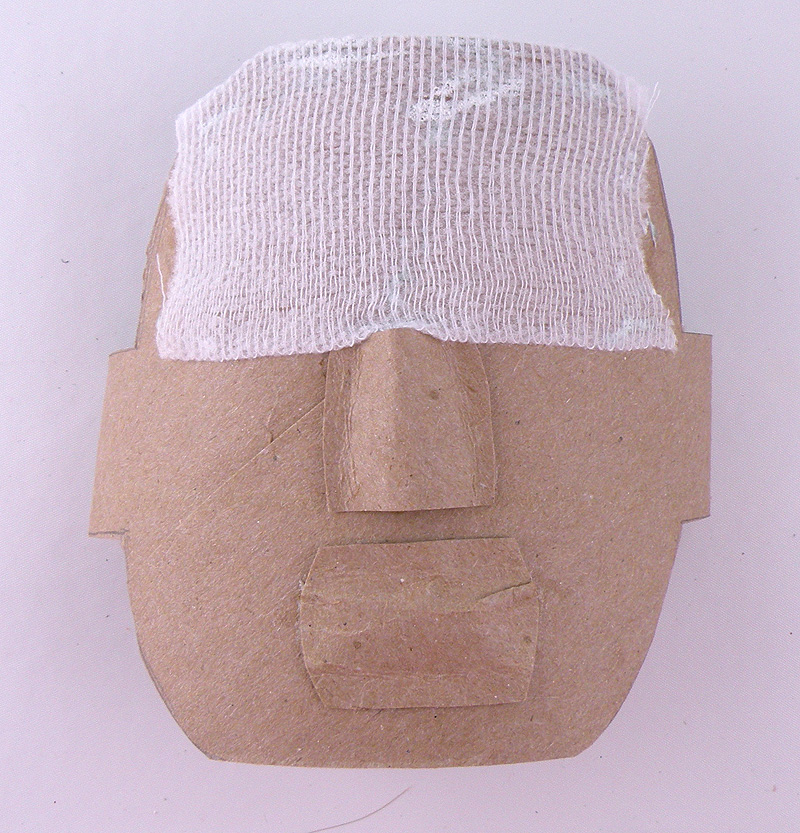
Step 3: Glue on a piece of the paper tube to create a nose and a mouth shape. Glue a piece of gauze over where the eyes would be.
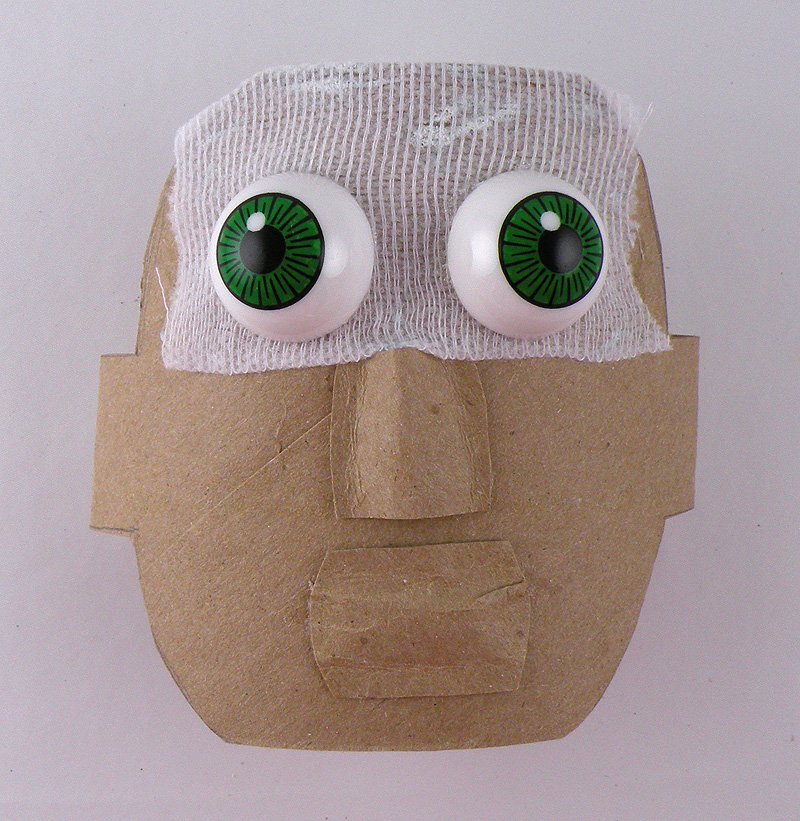
Step 4: Glue on the eyes.
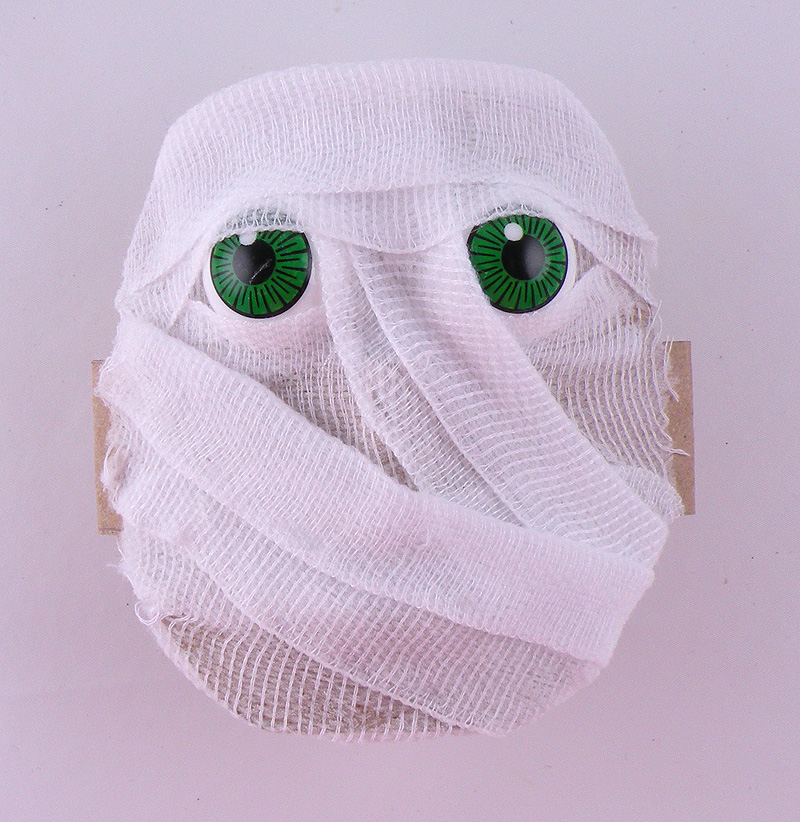
Step 5: Wrap gauze around the mummy’s head as shown above and secure with craft glue.

Step 6: Glue the tabs to the candy bag and insert corn husks to finish the look.