Beautiful DIY Decorated Cookie Tins
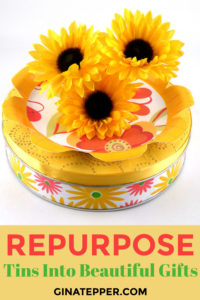
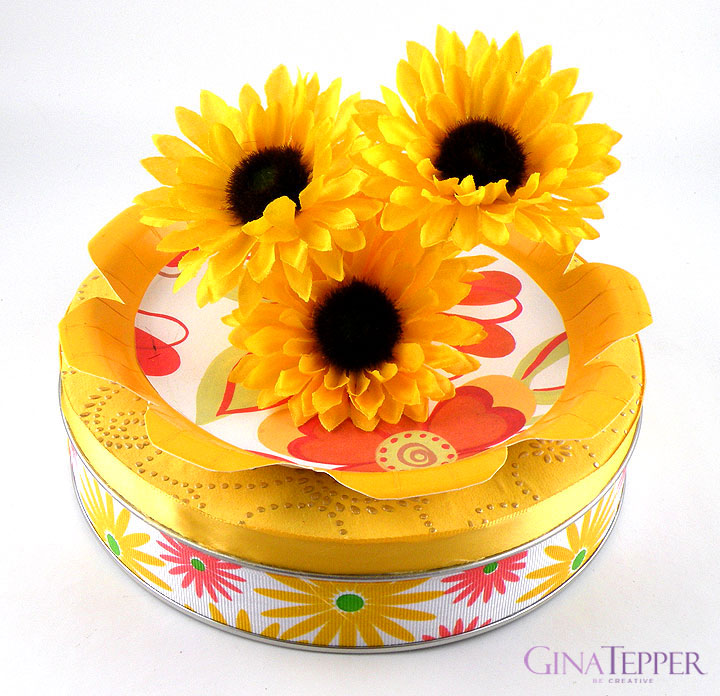
I love making fresh baked cookies and giving them as gifts. One of my favorite ways to package tasty treats is in beautifully decorated cookie tins. I transformed an inexpensive, plain white, metal cookie tin into whimsical, Spring and Summer decorated cookie tins design that anyone would love to receive even without the cookies. I accented the decorated cookie tins with pretty paper, ribbon and attached fabric flowers to the top of the lid to make them look as if they were growing in a Spring garden.
These decorated cookie tins are so easy to make with a few inexpensive items. I wanted to create them to be unique and personalized rather than just attaching decorative accents. I love to layer elements to make a more detailed and interesting design. Different textures and colors turn a plain cookie tin into something unexpected and spectacular. You can even repurpose a cookie tin that has pictures printed on it to create this beautiful design. These DIY decorated Cookie tins are so versatile, that you can choose any colors or types of artificial flowers you like to recreate these beautifully decorated cookie tins and they can be customized for any season or occasion.
Materials for Decorated Cookie Tins
- Round metal tin
- Small paper plate
- Four seasonal flowers with stems
- Floral scrapbooking paper
- Textured coordinating scrapbooking paper
- Floral ribbon
- 5/8†wide satin ribbon
- Hot Glue Gun
- Craft Glue
- Tape
How to Make Decorated Cookie Tins
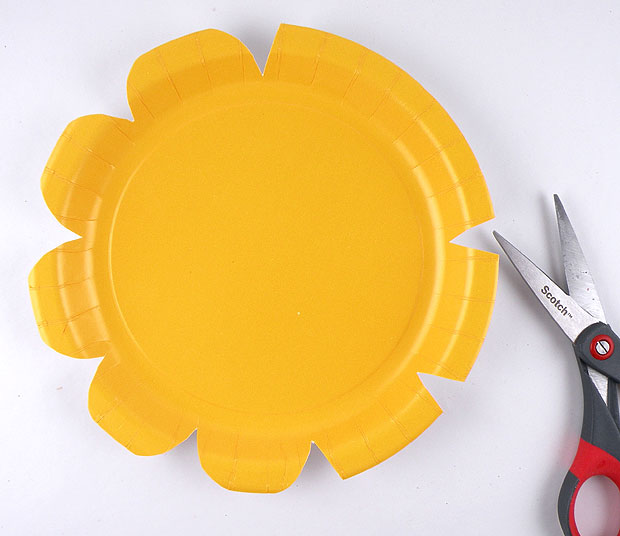
Step 1: Cut V shapes in even intervals around the paper plate. Round the edges to create petals so it looks like a flower.
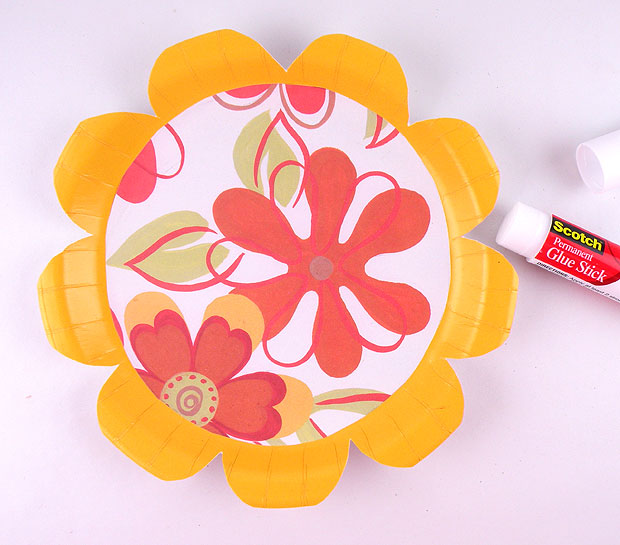
Step 2: Cut the floral scrapbooking paper into a circle shape the size to fit inside the flower plate and attach with a glue stick or craft glue.
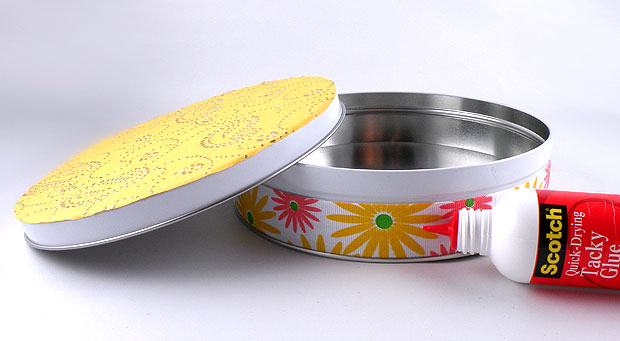
Step 3: Cut a piece of the textured scrapbooking paper the size to fit the top of the lid and attach craft glue. Glue the floral ribbon around the base of the tin, overlapping the ends.

Step 4: Glue the flower plate to the top of the lid with craft glue. Let dry. Glue the satin ribbon around the sides of the lid, overlapping the ends.
Step 5: Remove two of the flowers from the stems and leave two flowers on their stem. Cut the stems different lengths — one 2-1/2†and the other 3-1/2â€. Bend the ends of each of two flower stems at an angle about 1†from the end. This will give the flowers a more 3 dimensional look.
Step 6: Apply craft glue to the bottom of the bent ends of the stem. Attach the bent stem ends to the lid and secure with strips tape. Glue the remaining two flowers around the flower stems to fill in the holes.
Now you have a beautifully decorated cookie tin that is a perfect Spring or Summer gift.